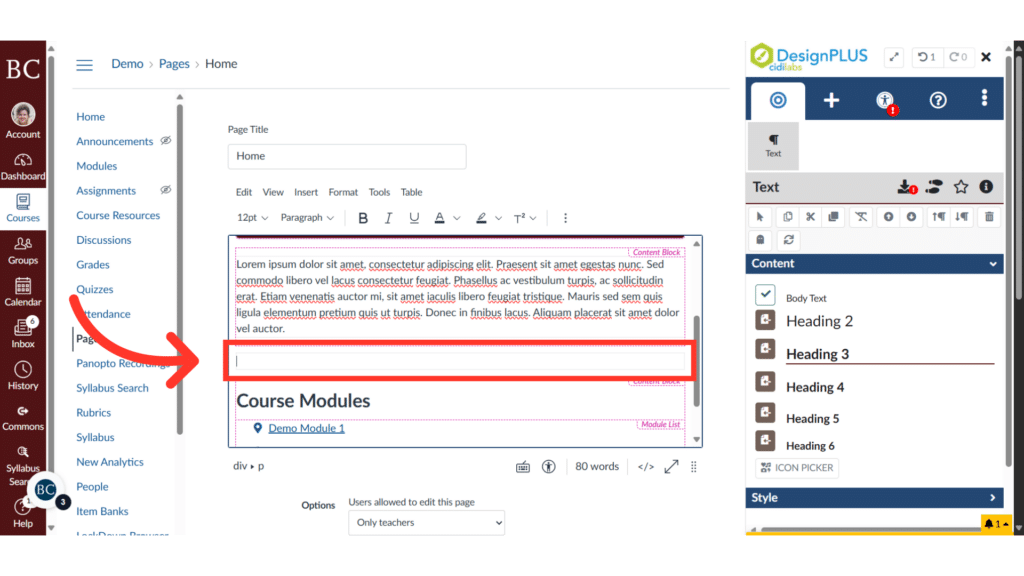
If you’re unable to place your cursor between elements, use the Action Toolbar to add a paragraph below it.
Video Walkthrough
Step-by-Step Instructions
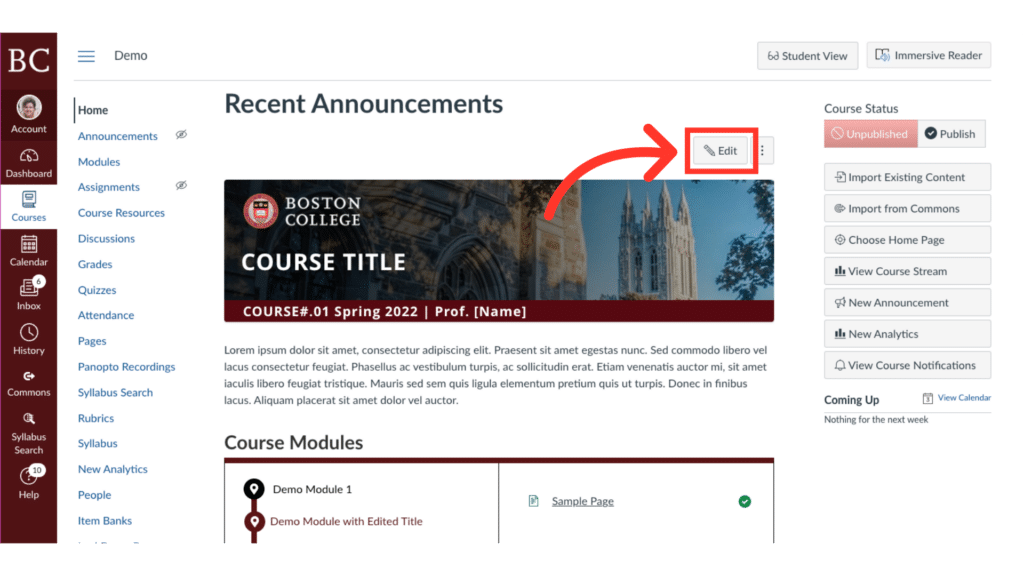
1. Click “Edit”
To begin, click the “edit” button on the home page of your Canvas course.
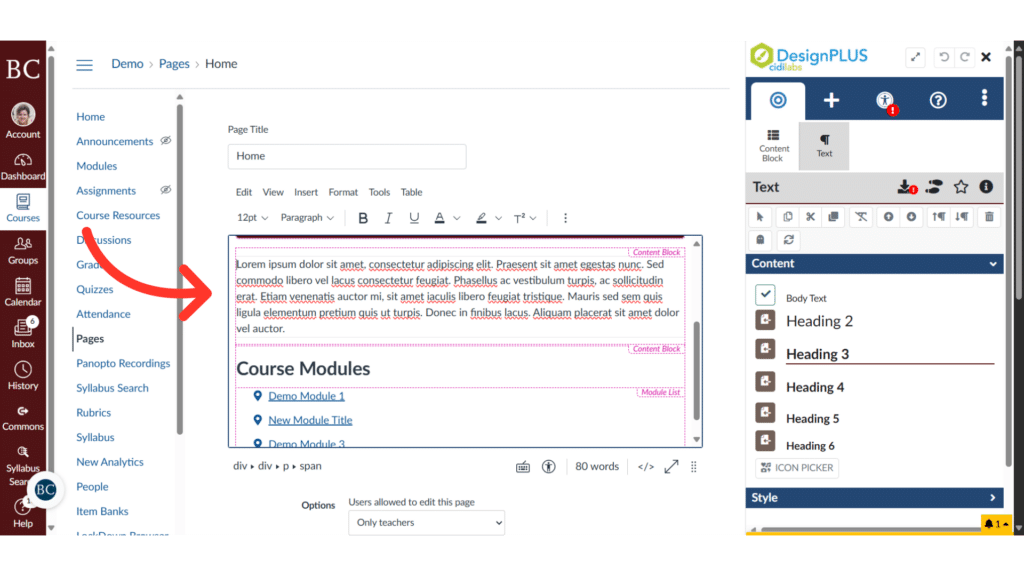
2. Click into the Canvas page
Click into the content block you would like to place your cursor after. For this example, we will be inserting our cursor after the course’s introductory paragraph.
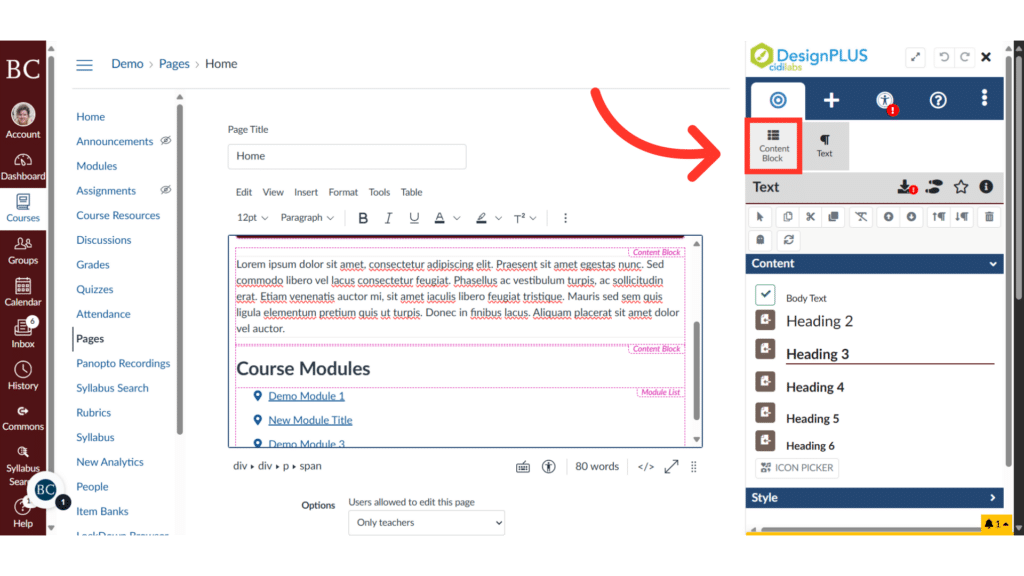
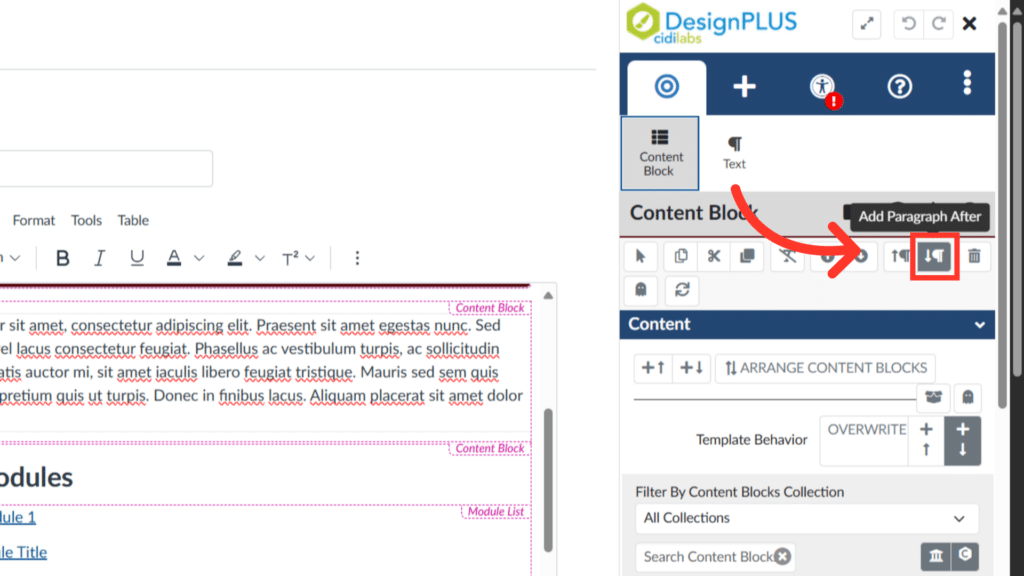
3. Click “Content Block”
Once in the appropriate content block, move to the DesignPLUS toolbar. Make sure you have selected “Content Block” on the far left of the selection tab.
4. Click “Add Paragraph After”
Next, click the “Add Paragraph After” button in the Content Block options.
5. Click between blocks
You should now be able to insert your cursor between elements in the Canvas page and edit accordingly.
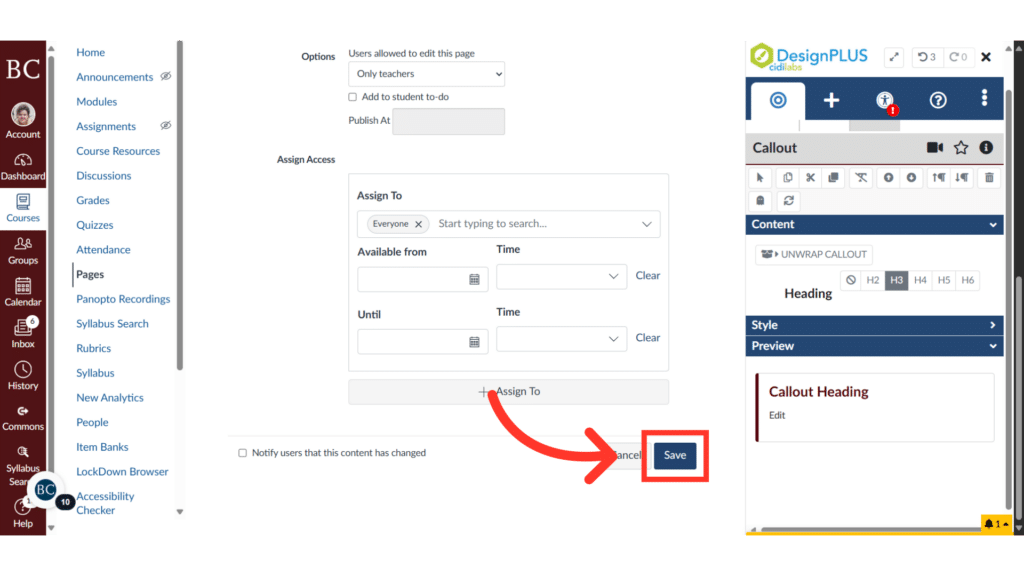
6. Click “Save”
Once you have made the desired changes to your Canvas site, be sure to click “Save” on the lower right portion of the screen.