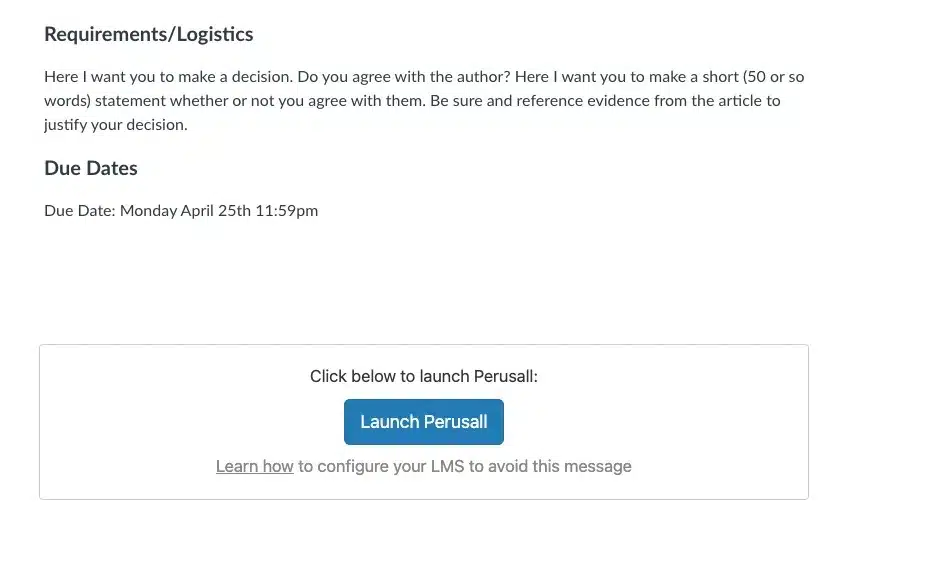
As of January 2023, an update to the Perusall Canvas integration changes the way you add Perusall Assignments to Canvas.
Note: if you have existing Persusall assignments from before January 2023, see Migrating Perusall Assignments to New Version (1.3) for more specific instructions.
Add New Perusall Integration (v. 1.3) to Canvas
- Click Settings at the bottom of your course site menu, then select the Navigation tab from the top menu.
- Look for Perusall at the bottom of the lower block of options and drag it into the top block, positioning it where you would like it to appear in the course site menu (on the left of your site).
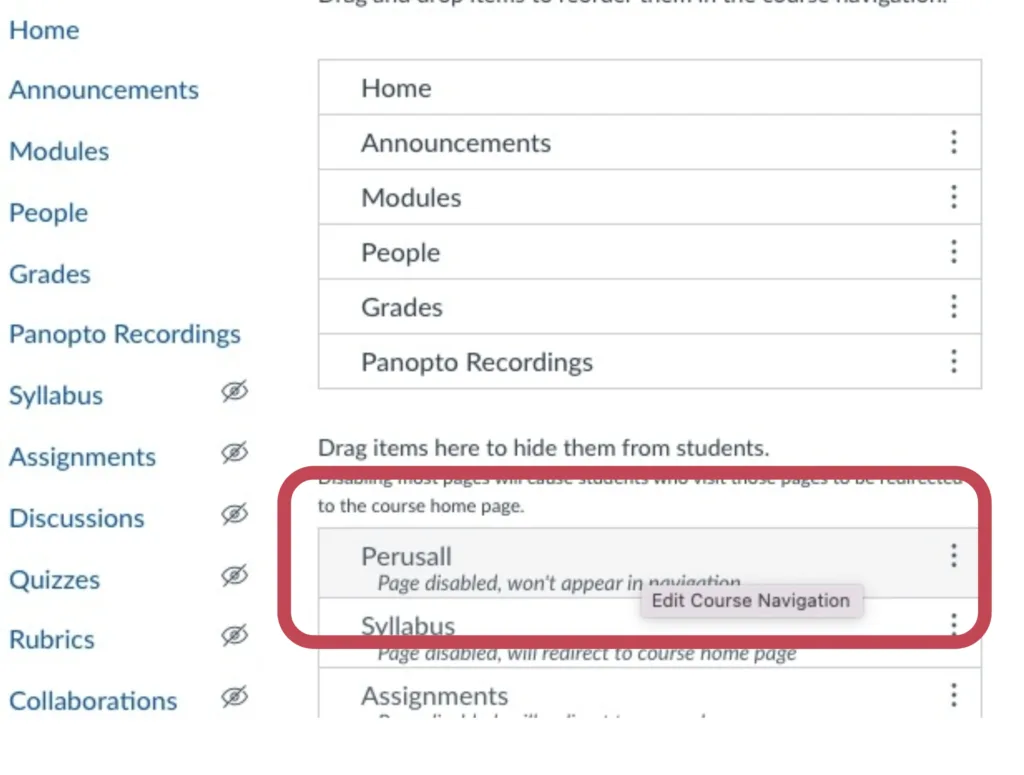
- Scroll to the bottom of the Navigation area and Click Save.
- Click the new Perusall link (now in the left side of your course), and you will be directed to check your email for a message prompting you to confirm that you want to merge your existing Perusall account with the new Canvas integration.
- Go to your email and open the message from Perusall. It should look like this:
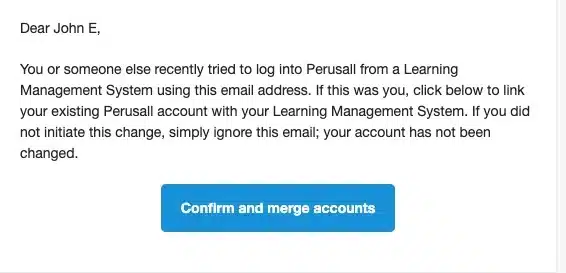
- Click the button in the email to confirm, then click the Perusall link again to enter the Perusall course you have just created. Click on “Get Started” in Perusall.
As you repeat this process for other course sites, clicking the new Perusall link will take you directly into the new course without requiring confirmation by email.
Link Perusall Assignments to Canvas Assignments
- Create a New Canvas assignment or go to an existing assignment
- Edit assignment settings
- Select “external tool” for the submission type
- Select “Perusall”
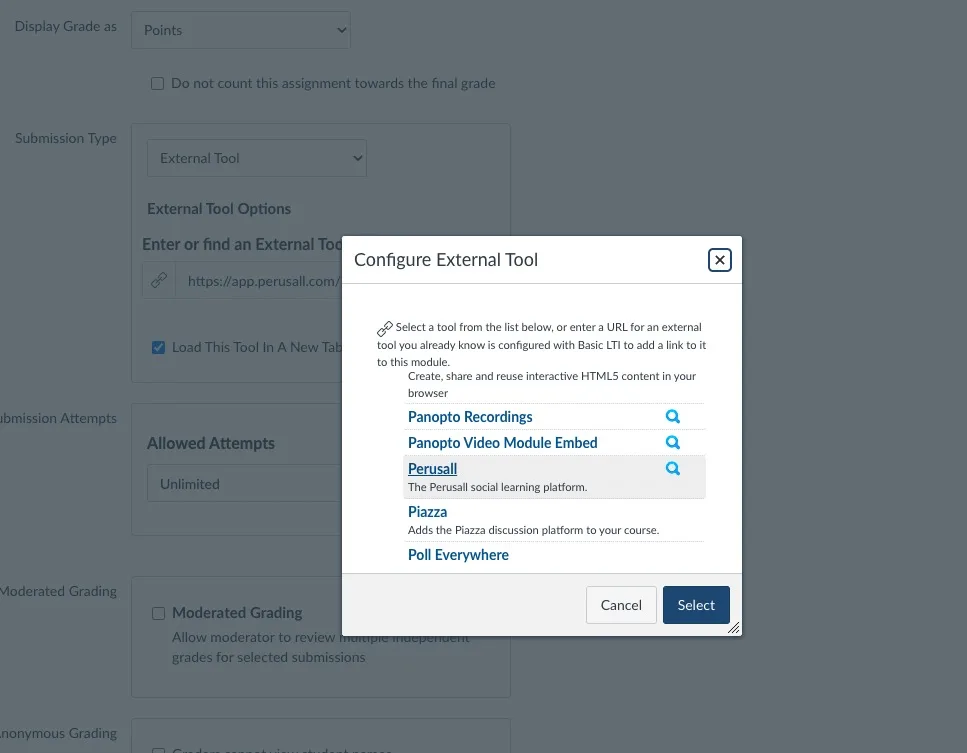
- A window will pop up that should show you a list of assignments from Perusall.
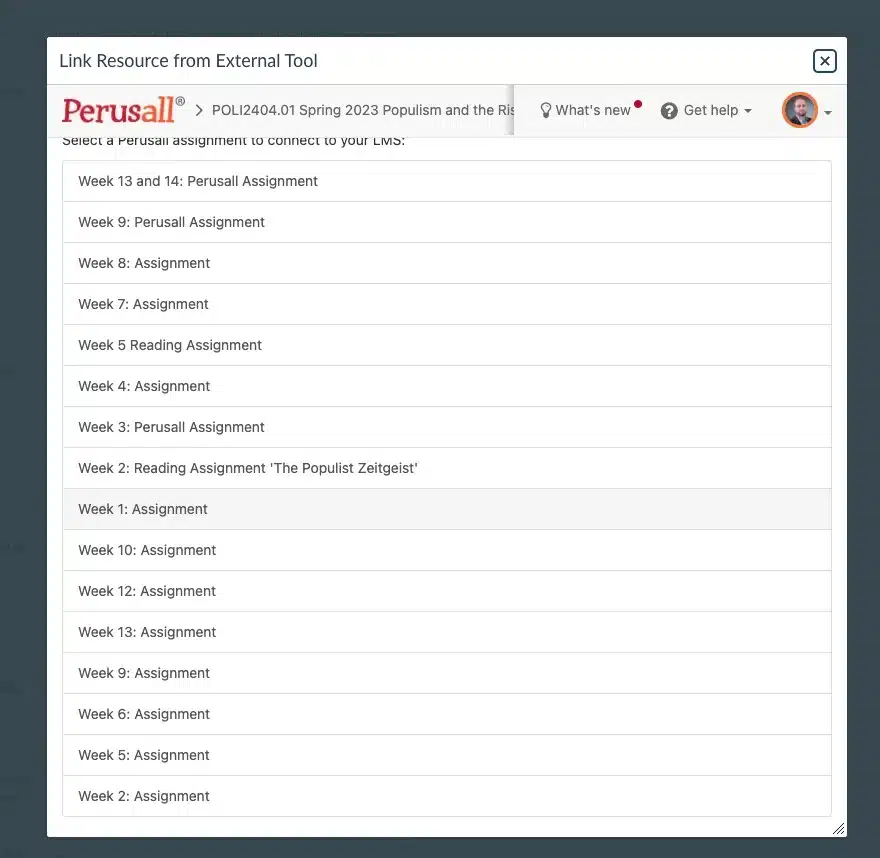
- Select the correct assignment
- The window will close and you will be taken back to the window that shows the external tools (the same window that you saw in step 4 above).
- Click “Select”
- Save the assignment from the bottom of the assignment page
- If you have done this correctly, you will see a box with a large blue button that prompts you to “launch Perusall”
