When setting up a Canvas site, Persuall makes it possible to migrate content from one course to another.
Video Walk-Through
Steps
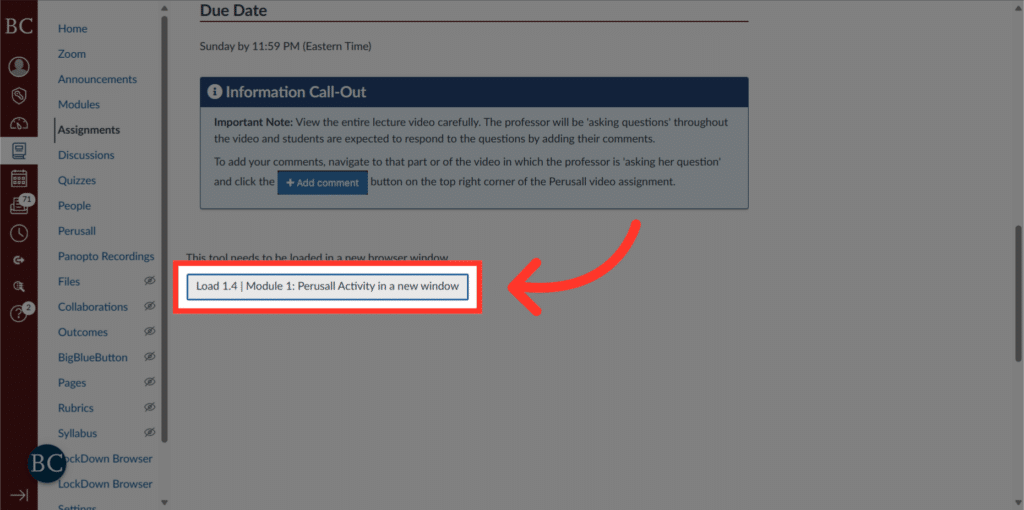
1. Click load in new window button
Open the Perusall Activity in a new window by clicking the load in new window button at the bottom of the assignment page.
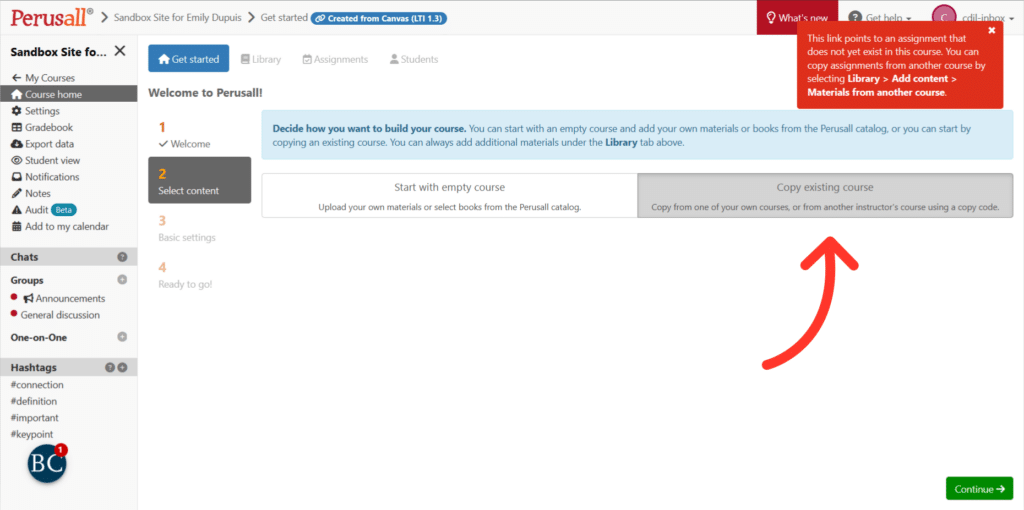
2. Once in Perusall, you will be prompted to start with an empty course or copy an existing course.
In most cases, you’ll be bringing content over from previous courses, rather than making a completely new one.
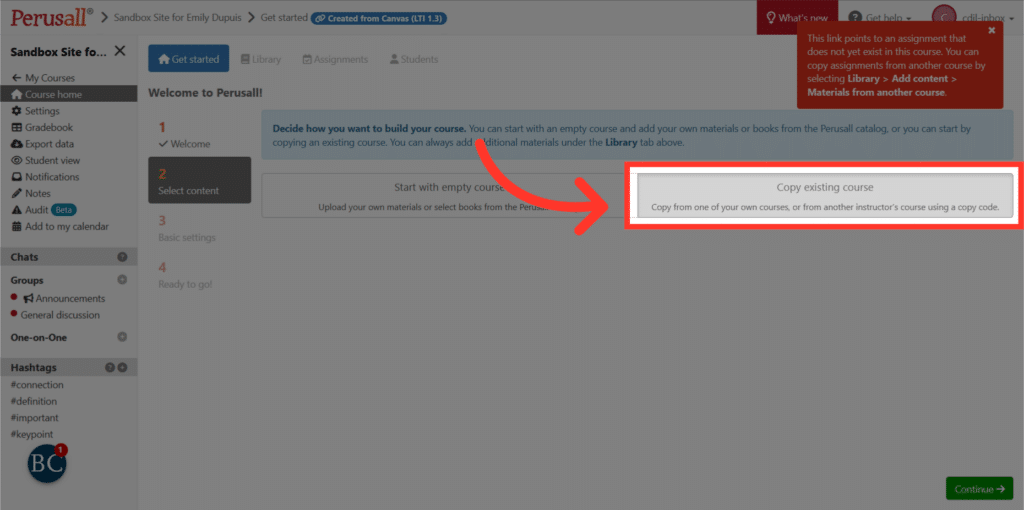
3. Click “Copy Existing Course”
To copy an existing course, select the option to copy from your own courses or another instructor’s using a copy code.
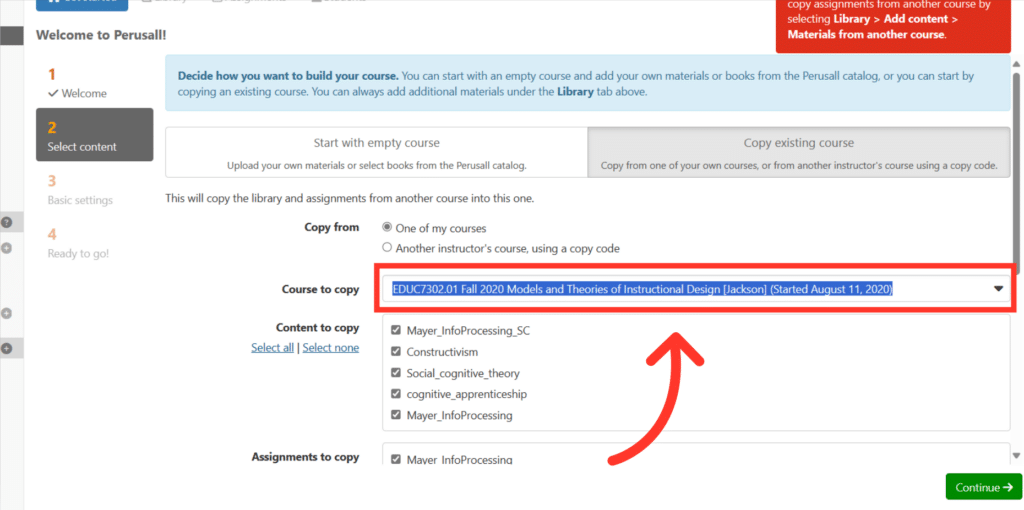
4. From the drop down menu, select the course whose content you want to import for Perusall assignments.
In the dropdown next to “Course to Copy,” be sure the course title and number matches the course in Canvas you are working on.
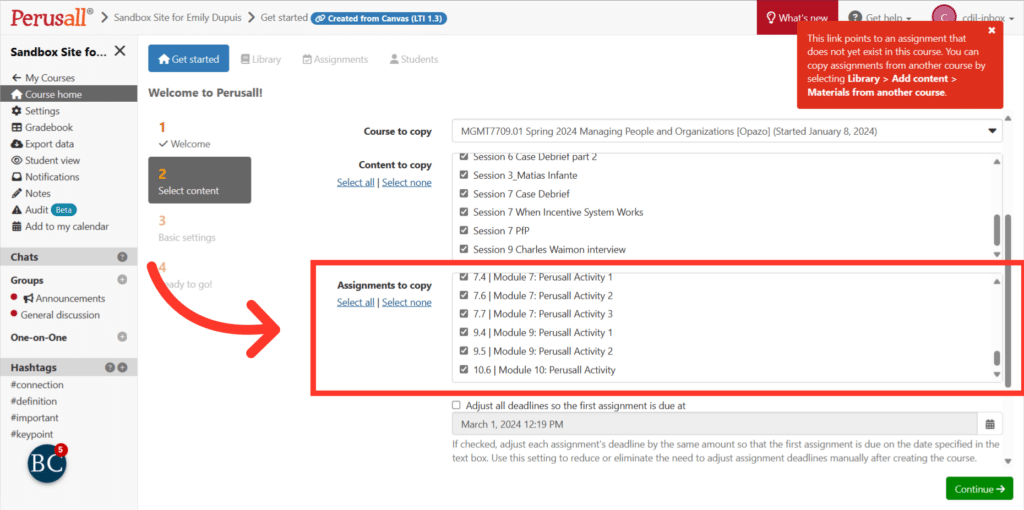
5. Selected the assignments you wish to copy over.
Next to the “Assignments to copy” label, check the boxes next to assignments you’d like to import into this course. In most cases, you will probably want to click “Select all.”
6. Click “Continue”
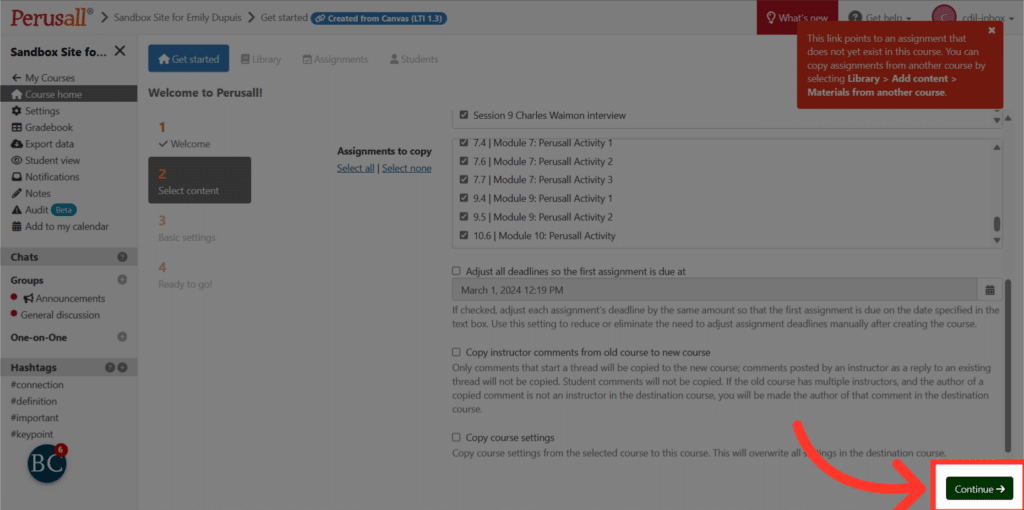
Proceed by clicking on “Continue”.
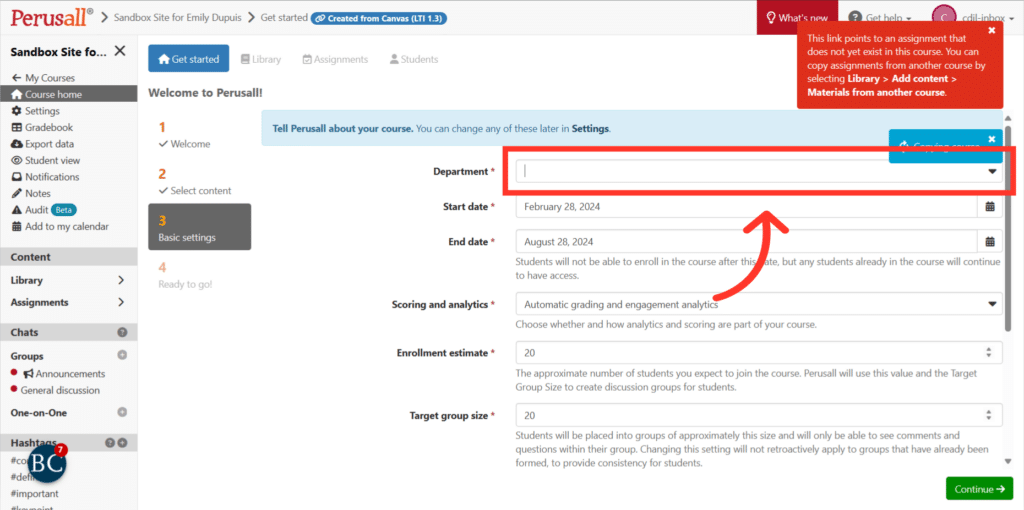
7. Click “Department” dropdown
Perusall requires a department selection to continue uploading content. You can begin typing your department name to narrow the selection for easier navigation.
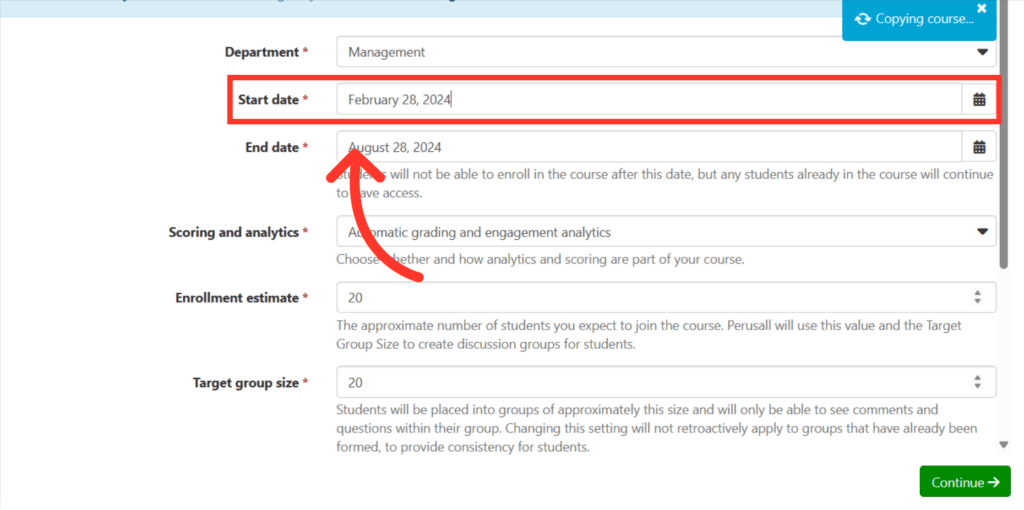
8. Enter the start date
Double check on the start date you wish the assignments to begin appearing on your course page. Perusall will automatically select a beginning and end date, so always double check.
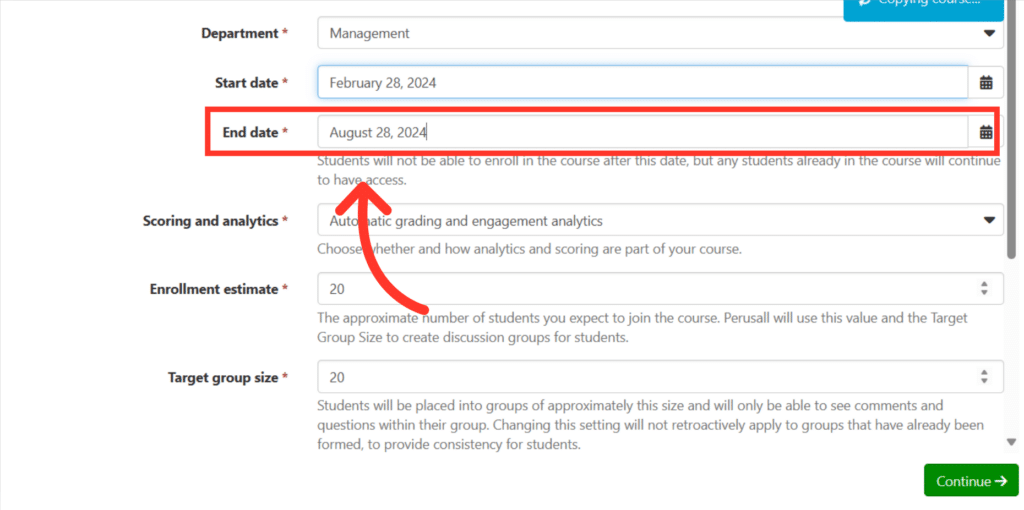
9. Enter the end date
Perusall will automatically select a beginning and end date, so always double check that the end date lines up with the end of your course.
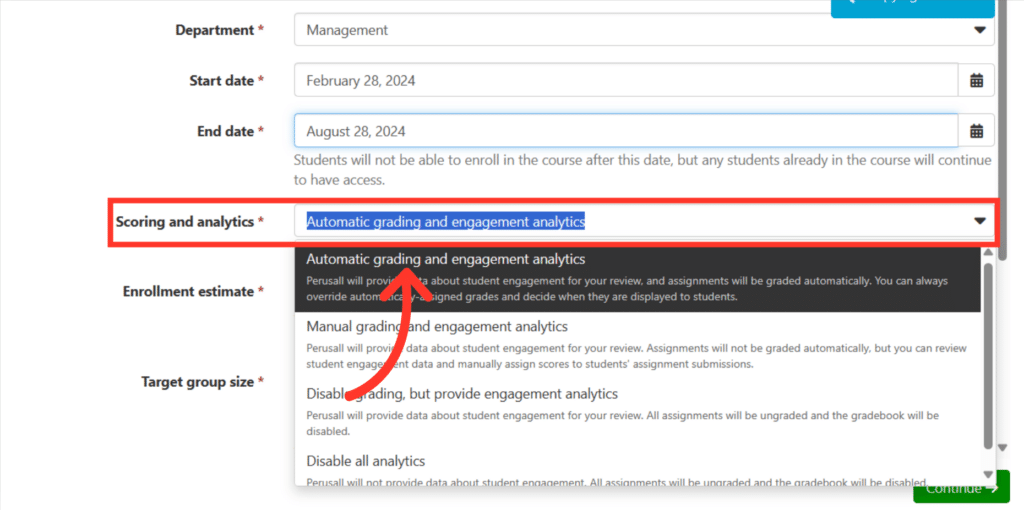
10. Click “Automatic grading and engagement analytics”
Be sure to check the scoring and analytics section. In most cases, you will wish to select the option allowing automatic grading and engagement analytics.
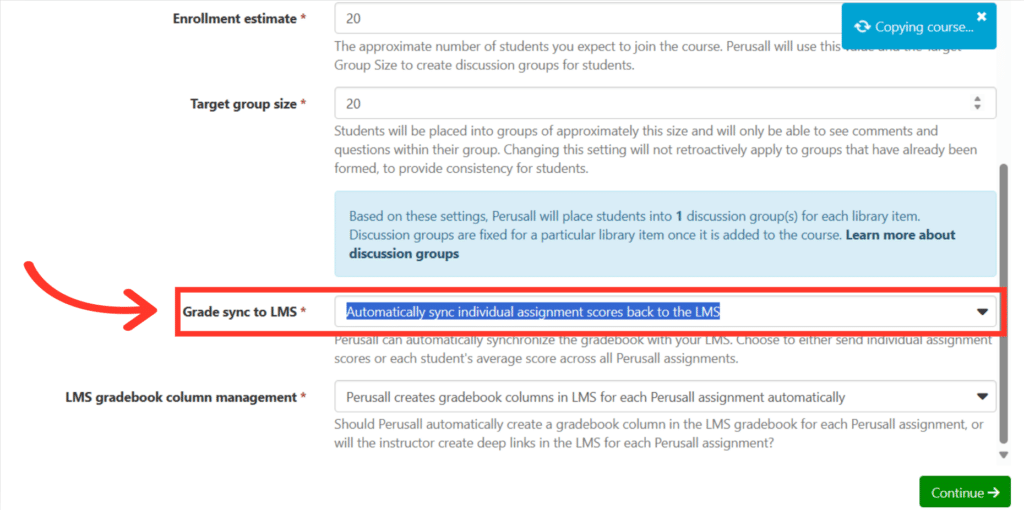
11. Click “Automatically sync individual assignment scores back to the LMS”
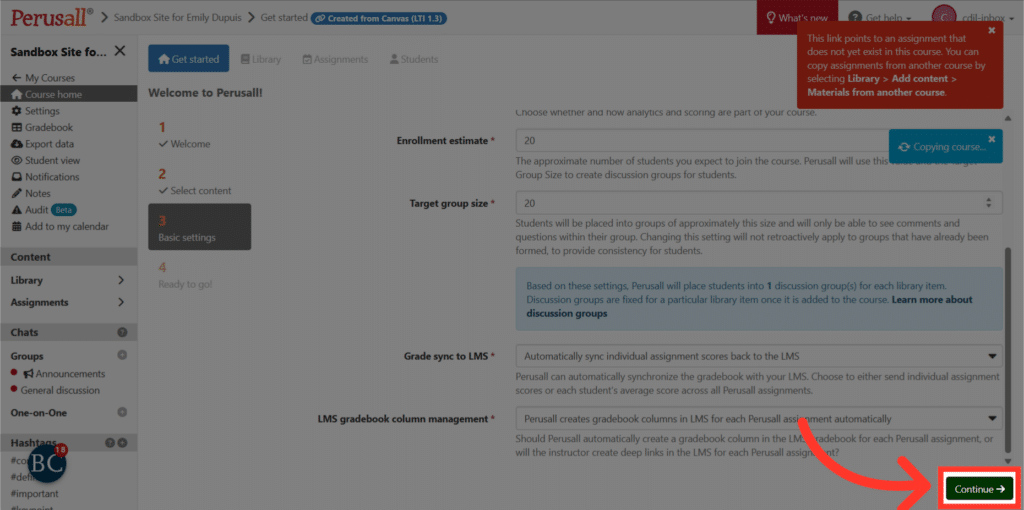
In the drop down menu “Grade sync to LMS,” you will probably want to select the option to automatically sync individual assignment scores back to the LMS.
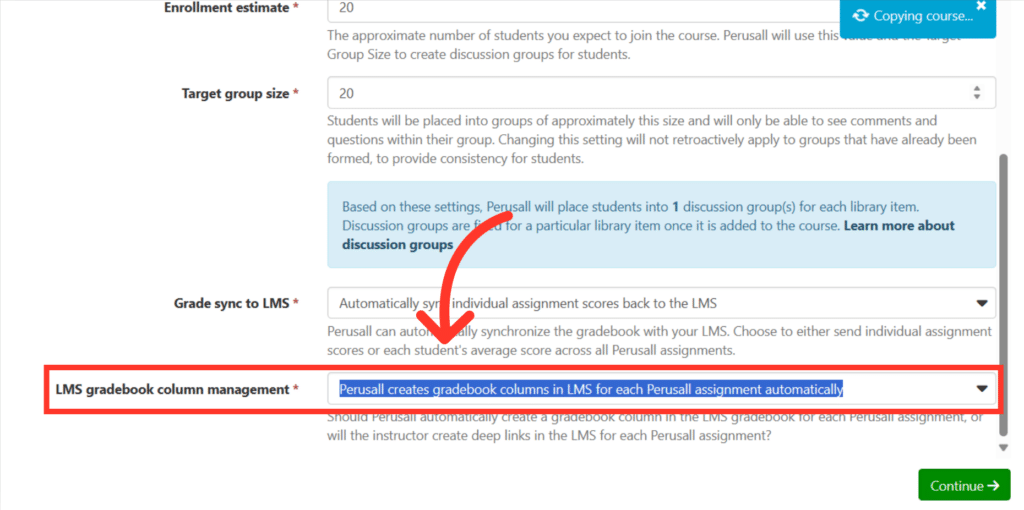
12. Click “Perusall creates gradebook columns in LMS for each Perusall assignment automatically”
For this drop down menu, choose the option for Perusall to create gradebook columns in LMS for each Perusall assignment automatically.
13. Click “Continue”
Proceed by clicking on “Continue”.
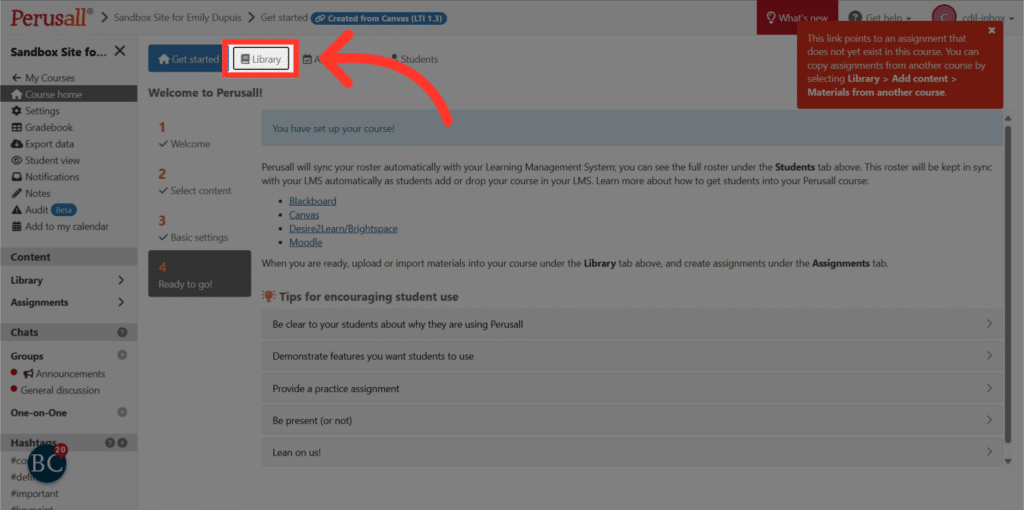
14. Click “Library”
Now that your assignments are copied over, you’ll be able to see them in the library section.
15. Click “Assignments”
Finally, double-check that all the assignments meant to be copied over are under the assignments tab, as well.

